
freeCodeCamp
By Abhishek Jakhar
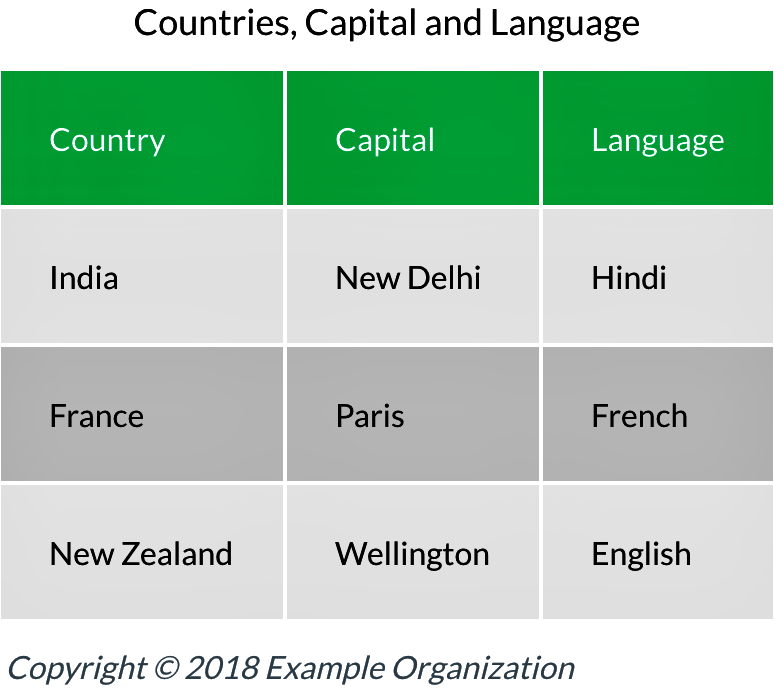
The web is filled with information like football scores, cricket scores, lists of employee names and email addresses. HTML tables enable you to display information in what is commonly known as tabular data.
NOTE: I have already added the Styling using CSS, so my elements will look different. But they will work in exactly the same way.
If you want to make your elements look like mine then, you can find my CSS file in the links given below:
CSS: https://gist.github.com/abhishekjakhar/2ea51dfc0dcf6f6ed0d44ac0e72f9c54
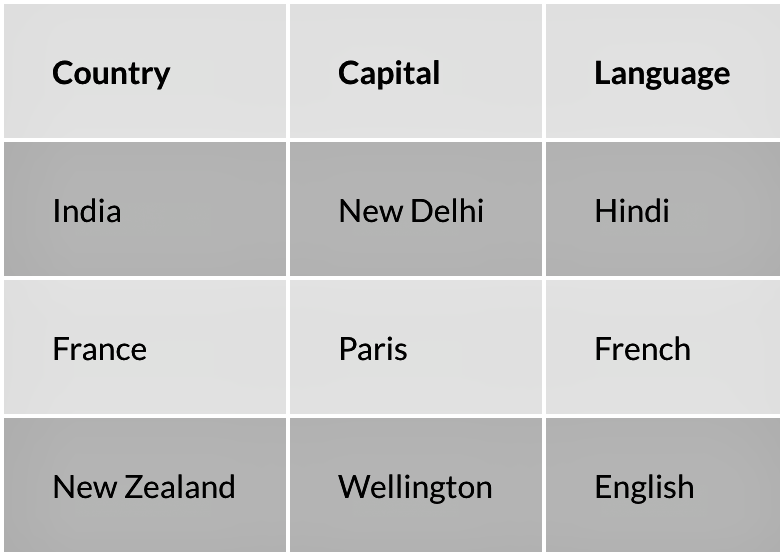
We can create an HTML table using the table element. It has an opening and closing tag, and it wraps all the table rows and table cells inside of it.
Now, let’s type a table row. Tables are made up of rows of information that go across the page. A tr> element is used to create a table row.
However, there is no element for the table column. Table columns depend on how many table cells are inside each row. A td> element is used to create a table cell. So basically the number of elements you will add inside the element is the exact same number of columns you will get inside your table row.
elements have no attributes. If you’ve worked with tables before, you may have used some attributes in the past. However, they are all now deprecated.
We’ve created a basic table, but it’s not clear that our first row in the table is actually an attempt to label each of our columns. Right now, the first row simply looks like another row in our table.
We can use a table header element on each of these three columns to tell the browser, search engine crawlers, and screen readers that these are actually headers and not just regular data.
Now we will be changing table cells in the first row to a table headers cell. To do that we will replace td> by .
The text in the first row is bolder than the other rows because of the th> element used inside the first
Similar to the structure of our HTML document, where we have a head and a body, we can also add a head and a body to our table. We will definitely not use the same HTML elements because then the syntax will become invalid. For the table, we have ad> for the head and <tbody> for the body.
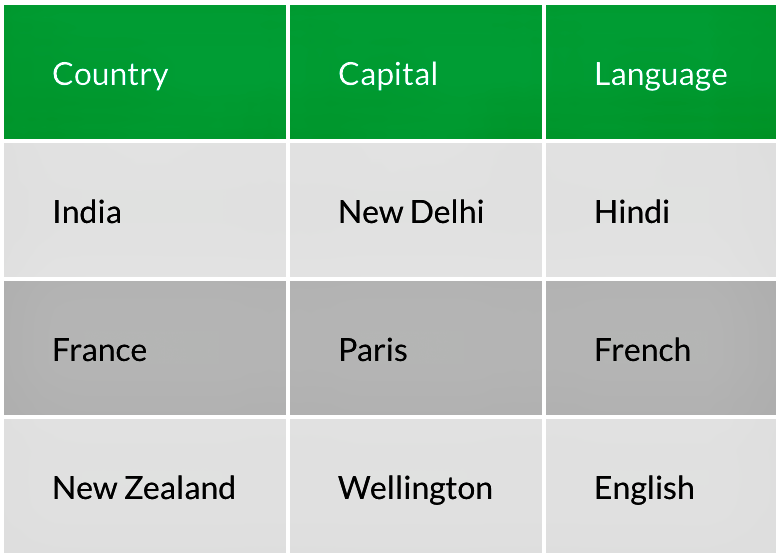
table head (d>) and table body (<tbody>) elements
We have a table head and a table body element. So of course, there’s a table foot element as well. But the question is what is the point of table footer element when we already have the table headers that label columns?
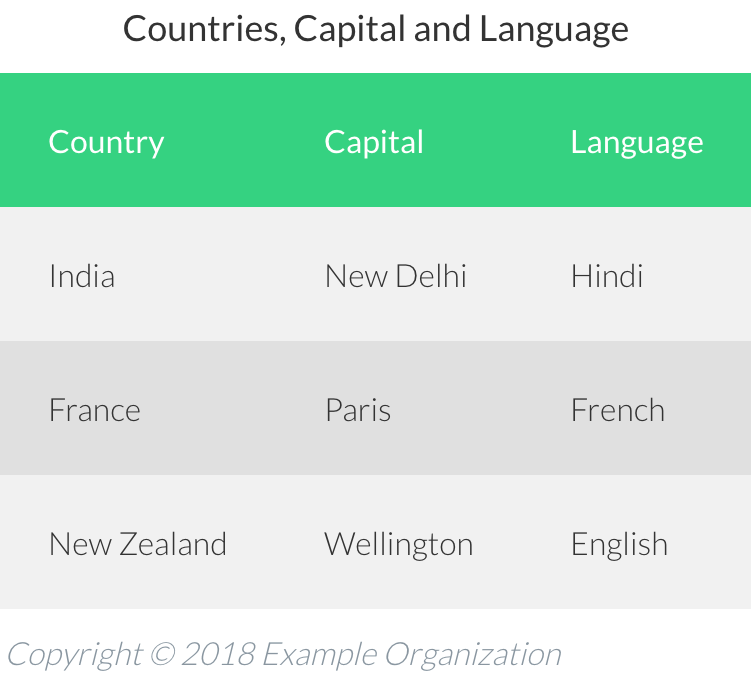
In general, a table footer element should contain a summary of the table. This might be some final cells containing sums, totals and averages for each column. It might also contain some meta information like copyright information or the source of data within a table.
Now, you would think that the table footer would go at the bottom of the table. However, it actually should go right after the table head element and just before the table body element.
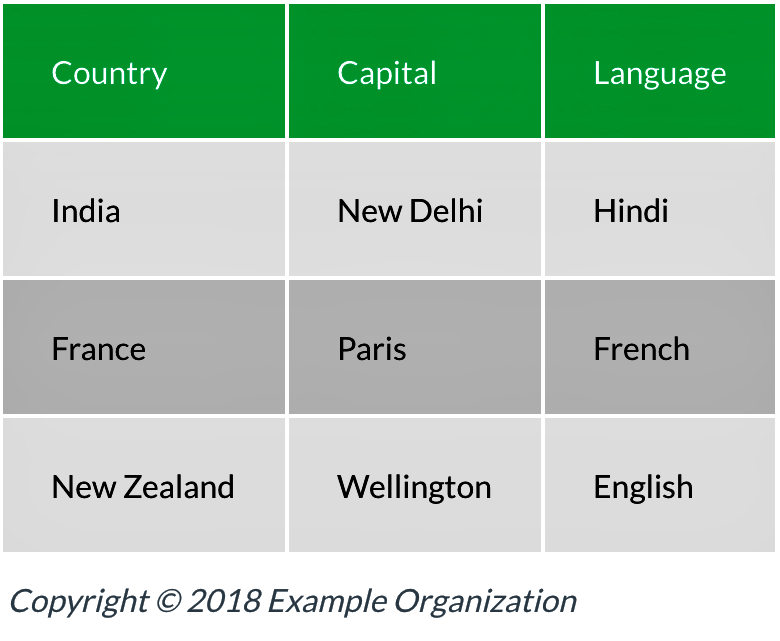
table foot (t>) element
This element is basically a title for the table, and it should come immediately after the opening table tag. This is nice to add because it quickly summarizes what a table might contain.
Now we have covered the essentials of table elements in HTML.
You can learn more about the tables in the links given below.
I hope you’ve found this post informative and helpful. I would love to hear your feedback!
Thank you for reading!